For this summary, I will link you all the work I have done for semester 2.
Category: 3D Realisation
Nick Pettit Work flow
Here I will research the workflow of a different 3D artist who has had experience with working in the gaming industry. This will give me a better understanding of how another developer produces their work in the gaming industry.I Can also reflect on their work and improve myself for the future.
Nick
Pettit describes an asset workflow that he models for game props. In his Blog post, he will be showing the development of an old radio for someone with experience such as myself II will pick up a few tips and tricks from this blog.Nick goes and talks about the word “Assets”” a game asset is a character or an object that’s meant to appear in a video game”Nick describes that most props that are created in a game are just humble props  meaning they are there just to fill out the background, so the game doesn’t look to empty: A wooden boat with boxes piled inside, a stone bridge, Some loot boxes placed in empty areas that could also be filled with Pots etc. Nick also mentions that creating a prop isn’t easy, it can be bewildering and time-consuming coming up with an idea that would have to fit that certain type of environment. Nick also explains Motivation for creating new assets can come from a variety of sources, such as walking down a street you see something old or fascinating, you then start to get motivated so you get your pen and paper out and
  start drawing that object you find fascinating. Nick also explains about polycount and shows the development of the 3d process to many polys can effect a game.that’s why a lot of developers like Nick do most of the detail in their textures.
I found his Blog post to be very useful, but I still would like to do more research about UV mapping because it is what I am lacking in my portfolio.
Group Project Creating a Building
Pitch
My idea is to have a comic Bookstore that allows other people to look into the comic shop window to see a different variety of comic books, The comic store will be Themed a 90s bookstore, I want my shop to be a part of history so making the comic shop vintage and old is very important. The wood planes on the windows show wear and tear from the rain washing away the original paint. I want the door to look old but main held together by the glass pane, Every time you open the door you hear the old bell ringing above the door.The windows at the front of the shop will have some Posters that the shop had advertised in the past.The shop will show the shutter like there haven’t been pushed up properly, I won’t have any neon lights or anything like that but just a simple hangover light that illuminates’s Just the sign and the path below. At the front of the shop there will a small bench and a newspaper stand and possibly a gum ball machine, I want my comic shop to look inviting and to have a lot of narratives.
At the end of the first year, I am hoping to present a Winter, Autumn, summer and a night scene as my final render. At night the shutters will be down the light will stay on to illuminate the sign above so that night time adventures who come to pass by will know where their local comic shop is to visit another day. The Autumn will have leafs piling again the shop, and the tone of the comic shop will look blue as the day goes on, at dusk the scene will turn bright orange from the sun.
Winter: This May have snow on the ground also on certain props outside of the shop.The color will also be dark blue or really light depending on the weather(example snow is on the floor everything is bright and cleaner).
Night time: The shop will be closed to the public, the shutters will be down and the light will flicker once in a while. The night will be cold and toned Dark blue.
Research
Marek Denko( 3D artist)
Marek Denko was born in 1980 making him the age of 37 years old. Marek DenkoFirst fell in love with a computer in 1991, his first computer was the Atari 800XL. in 1991 he discovered a 3D program 3dstudio R4 and began to Learn, study freelancing in game models and architectural visualizations.
Reference images
Here are a few of reference images I collected near ST Stephans.The images include different parts from a shop I will implement these different parts from all the images and complain it into one.


")


Sketches
Now I have done a rough layout of the street and a design what the front of my shop may look like.I am to move further into photo bashing,I will use this method of creativity to help me proceed further into my design.

Photobash.
To develop my design even further I have made a Photobash with the images I had collected of what a comic book would look like. The reason why I did photo bash is because I want my shop to look different and more unique from any other Comic shop. My Idea was already planned for my shop to be themed in the early 90s, so I went on google and picked different images that had a good narrative. I also went out to my local village Sutton and began to take some pictures of the old shops, such as Windows and doors.

Sketch up
To Help me develop my ideas further I had modeled my comic shop in Sketch up. (not to scale). I started to draw a box on the floor and extend it upwards. After I was ended up with a box I used the cut tool to cut out my windows and doors. so that it had a more of a look of a shop. I then added the Roof hangover to give it depth, didntI also brought out the wall so that it didn’t look flat. 
Comic Font
I wanted more of a Comic Font so that I could use for my sign.
link to the fonts I had used.http://www.dafont.com/theme.php?cat=102
Comic Concept
I wanted you to see comic books from the window of my shop, I went and sketched out the (ActionJoe) Title in my book and colored and adjusted it to look like a comic.
The comic will be 25cm by 16.8 cm.


Comic Shop Progression
Here I will show you the progression of my building. As you can see I have shown you the very Basic on how I created my comic shop. Starting from gray blocking at the right dimensions of a common comic shop.learning dimensions is vital in the gaming industry, A good dimension is A real life-sized house, scale, GTA is a great example for this because of the open world and the Big city of LA. A Bad dimension is when nothing is to scale making the objects too small or too big, Gmod is a great example because the game engine(Source) allows anyone to create a game mode with its custom map.
The Dimensions of my building are
731.0cm Length
487.68cm Width
365.76cm Heigh
Door and windows are also to scale.
Door
96.52cmLength
1.108cm Width
264.16cm Heigh
Window
299.757cm Length
10.775cm Width
205.811cm Heigh
My paper stand is also to scale 40 cm all around.


Here I tested the model within unreal to check the building dimensions.


Texturing Progression
Now that I have Completed my Model, I am now ready to take it into Substance Painter For texturing.I have Used the default textures already inside the software. I then Began to paint my textures onto my UVs. After I had done I exported my textures as PBR this would make my game more realistic with no shadows on my actual texture.


final Render
Here I had changed the lighting within the Unreal engine, I added 2 skylights to give the extra shadow underneath the roof hangover.I then changed the light color to a mild orange to give it a warm atmosphere.


Base Color maps
Here are all the color maps I used for my comic shop.


Putting it into Unreal as a group
now I have completed my model, as a group we were to put all our buildings into Unreal Engine 4. once we had all merged all our building into one level to form a small town. Now we have completed this task ,a playable shooter game could be played within our level.


Evaluation
This brief has given me another Skill that I had learned in substance painter, I also tried out Substance designer to see what the differences were between the two, with Designer you created your own texture and with painter you painted the texture onto your model. I really enjoyed doing this brief because I tried to make a shop a few months ago for personal work but the texture and scale were all off it looked horrible, I have improved a lot with my texturing skills just by spending time doing this brief.toward the end of my design I was constantly changing on how my shop looked,I am pretty pleased with how it has turned out.
A Strong knowledge of Sculptris
A Strong knowledge of Sculptris/ tied in with 3d Realisation
Sculptris is a free 3D modelling application, that was made by Pixologic the same company that developed Zbrush.Sculptris doesn’t require installation, it makes it easy for developers to create organic models and to add narrative into the current models that they had modelled in a third party software.Within the program on the Left-hand side is your Toolkit or your digital hands to model the clay ball. The top of the application there are slide bars these control your strength, Size and alter the material that you see.
Holding the ALT key on your keyboard and the mouse allows your to rotate around your clay model to make it easier to model.useing the Toolkit is very easy you can hold SHIFT and click on your model for it to mold inwards or let go of the SHIFT key and it allows you to pull the clay outwards Depending on what tool you are using. After a while of using sculptures became second nature to me. For my Peer, I modelled Ryan Green, Whilst Ryan was working I began to look and take reference on his striated skeletal muscles within his face, I saw that Ryan had a long face and it was less straight down from looking at his front, he also had a small Frontal and hair that curled backwards.His ears stopped on where his Premaxilla began( just below his nose).

I found it quite hard but very pleasing to sculpt an organic shape, I thought it would have been a lot harder to create because I didn’t really understand how the face worked, But after my research about Anatomy and facial structure, I began to understand where each muscle was in Ryans face. after finishing this Digital 3D image It didn’t really look like Ryan but an elf from The Hobbit. I plan to Practice more with sculptris because I know there is a lot more to improve on.
Texturing types and low poly guitar
This mini brief, I am a signed to model my guitar with less than 128 polys. The aim was to create something personal to you; in my case, I was told to model my Sigma Guitar what I played every now and then for a hobby.
Reference images

Final render
since I was limited to a number of polys that I could work with, the guitar seems to be very basic and blocky, Because the guitar strings were cylinders and cylinders has a lot of poly count due to the smooth curveI had no choice on not adding these strings onto my guitar.
My guitar dimensions were
128 polygons
23.5 cm wide
16.5/22 length
4 cm height 2.5
It is important for my guitar to have the right dimensions just in case I wanted to import into UE4.


Evaluation:
While creating the guitar, I found it easy to model in Low polys. I also found it when I model in low poly it makes my guitar seem ugly and not realistic. Texturing the model may block out the pointed shapes and edges of my guitar. For my future experiments, I do more experimentation with low poly models.
Different Types Of Texturing
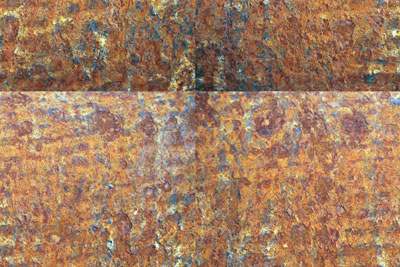
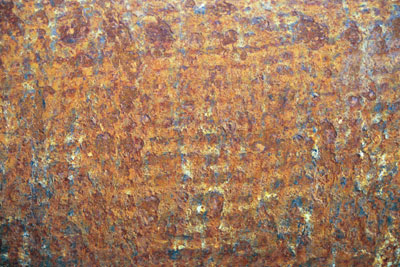
Texturing, Texturing is a method that is used in Music, fine art, and interior design. after Texturing Referred to a method called diffuse mapping that simply wraps pixels form’s a texture onto a 3D model. Many techniques that are controlled by advanced hardware have made it possible to achieve to simulate near-photorealism in real time.A texture map is a map covered by the polygons that are made from the mesh you are applying the texture too.To achieve texturing you can take pictures of any surface you desire to put it into photoshop, make it seamless by offsetting your texture and making it a minimum of 1024×1024, failing to do this you will end up with unwanted lines on your model because of your texture. an example of a bad seamless, and a good example of a good seamless texture.
Research about developers who use this method………………….

Here I have given you a clear view of my PBR texture and an Understanding of using texturing, I have shown you Different perspectives of each material on what it would look like with or without the mapping, This picture shows you Normal and Base color,`With or without ambient occlusion and what the final texture looks like when all Texture maps have been applied with a blueprint within the Unreal engine(UE4).

I have learned a lot Doing this Mini project, Including making PBR textures in Photoshop Improving my presentation on my work for future modules.I keep on practicing materials and textures because it makes a good looking environment.I want to improve the narrative in my materials by adding stickers, broken bricks to show that it has age or history.
First time Texturing Experiment
Because I didn’t have my model from my previous session on me from 3D realisation, I went ahead and created another mesh that is a Computer monitor.Once I had modeled my monitor I had the task of texturing using the UVW modifier on my Monitor.Adding texture was another challenge for my model for it to look realistic. In 3DS Max I used a modifier called UVW mapping, this allows me to see my Uvs within my mesh, UV allows me to set each face which allows me to Flatten the UV .which made it easier for me to apply a texture to the correct face.
I then went into Photoshop and added a texture that I found on the internet using my UV as a guide. The texture size was 1024 x 1024 which meant it was is big enough for a small mesh-like My monitor.In Photoshop I used the stamp Tool To copy the plastic texture within the Guided lines of my UV. I also grabbed a Screenshot on what I was working on while I was in 3ds max And used it for the screen on my monitor.
I Enjoyed Texturing as I did in my previous modules for 3D, I seem to have gotten better with my texturing because I learned how to correct my Density texturing as well as my base color. I am not perfect at UVW but I am determined to be better for future projects.


Hard Surface Modelling wip
To improve my 3D modelling skills we were given a task of a hard surface modelling.when modelling` a hard surface so A floor, wall or any other hard surface. When creating a hard surface we went and grabbed a picture off the internet of hard surfaces which is a floor.
For this task, I decided to create a floor. I found a hard surface of a floor on Google That I liked because of the sci-fi look it had, The floor I choose reminded me of Alian isolation. That game uses similar hard surfaces on what I had chosen.I recreated the hard surface in 3ds Max. To remove the harsh and pointy corners I used the bevel tool and the smooth modifier to give it that smooth look. I only did part of the floor because it’s a recreating pattern.
Something like this is important and extremely helpful when it come to modelling, for example when I look back in my previous projects, The Wall I created has multiple layers such as wiring pipes indents in the metal floor. I have enjoyed modelling this brief because it has tought me to understand what hard surfaceing is. I can now implant this method in my future and persoanl projects.


Back Of a shop Concept
For this brief, our class was each set a task to build a small environment prop in 3ds Max. This exercise was to improve our 3d Skills and to help visually create a building in my case I were to build a behind of a shop wall with at least 2 vents.Because I didn’t really use to take notice of Tall buildings but this exercise gives me a chance to improve that skill and began to look at building differently.
Reference images
The reference images will give me a better perspective on how I could create my wall.
my pitch was to create a wall that was from behind of a takeaway. I wanted rubbish to be everywhere, big dumpsters that are filled with trash.I want my scene to have some Narrative. I want my place to be used.
Because I live near a takeaway I where to adventure out to take pictures of the back of the shop. The environment this take away had was perfect on what I visioned it to be.
Reference images


Sketches
To help me develop my Ideas I drew some sketches from a photo I had taken. These pictures will give me a create perspective for when it comes to modeling.


Render
Before I started my wall I did some prop modelling experiment, Here you can see a basic un-textured barrel that will be placed within my scene.

Mannequin Concept
In this mini brief, I was to develop stages that lead up to creating my 3D modelling in 3dsmax, I have chosen to present my drawing in a new way to give others a better understanding on what I am planning.
On Wednesday 8th of February 2017, I was given a mini Brief to find a manikin that was within the Open University building Once I finally found my Mannequin I took front back and sides photos of my Mannequin(this would help me when it comes to 3D modelling the manikin). I feel like some Mannequins are scary
The mechanic of a scary Mannequin can be a key element for horror games due to them not having heads or arms you know they can’t move in real life but your brain tells you otherwise making you want to look behind you. Is it still there?


Here I have developed a 3D model of my Mannequin my images show front and sides.I found the organic structure to be rather hard to model because I have never done this type of modelling before I found the chest area to be a lot difficult than I imagined. I tried to re Shape the chest to look more like an organic form instead of it looking like an alien’s body. I would like to improve this type of modelling in the future, corps character design does interest me to proceed further on to developing a final peace. The model currently could be used as a rotten corpse in a horror/action game.
Evaluation
I partly didn’t enjoy modelling this organic model because I thought it was too hard for me to model at this time.I am so used to creating hard surfaces models like props, build buildings. But I have never modelled an organic shape.I do want to improve my modelling skills but it will take time and practice. I can do better with my organic model if I had more experience with 3dsmax. also, My presentation skills have improved greatly I now move all my scanned images and align them in photoshop.
